Traveler eSIM Installation Guide
Google Pixel Installation Steps
Note: Do not interrupt the installation process. Before installation, ensure the device has a stable internet connection.
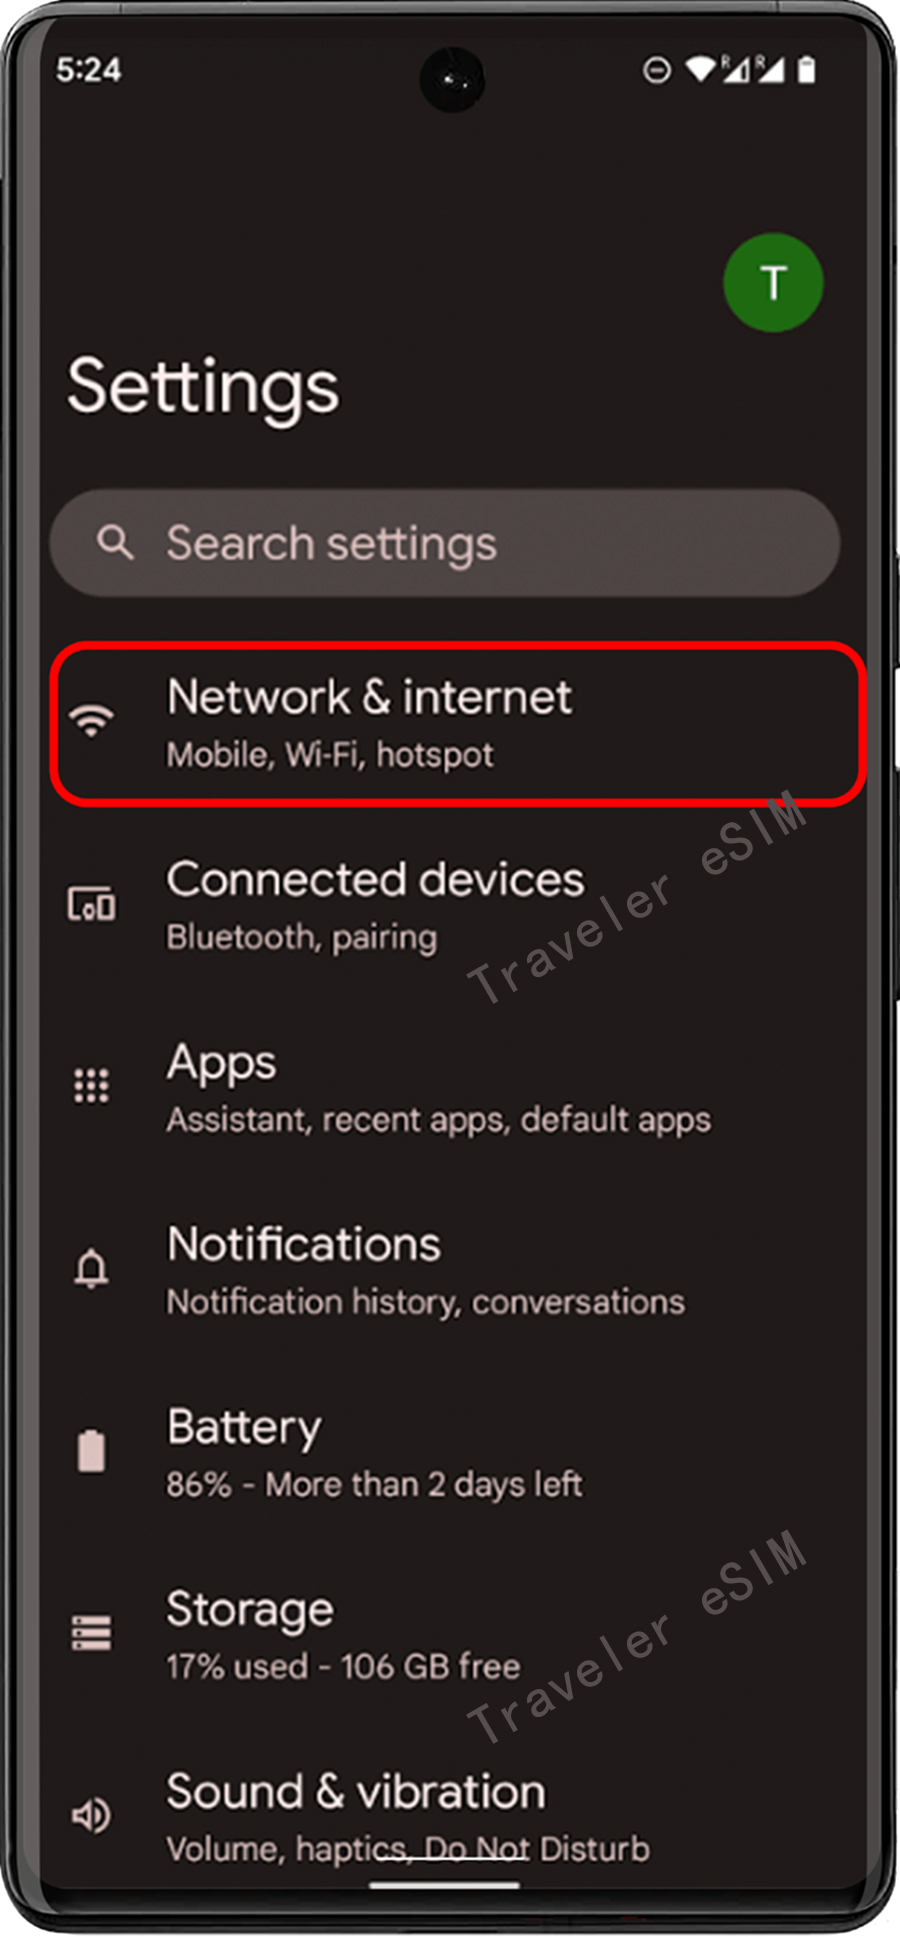
Step 01
① Go to the device's "Settings" and tap "Network & Internet".
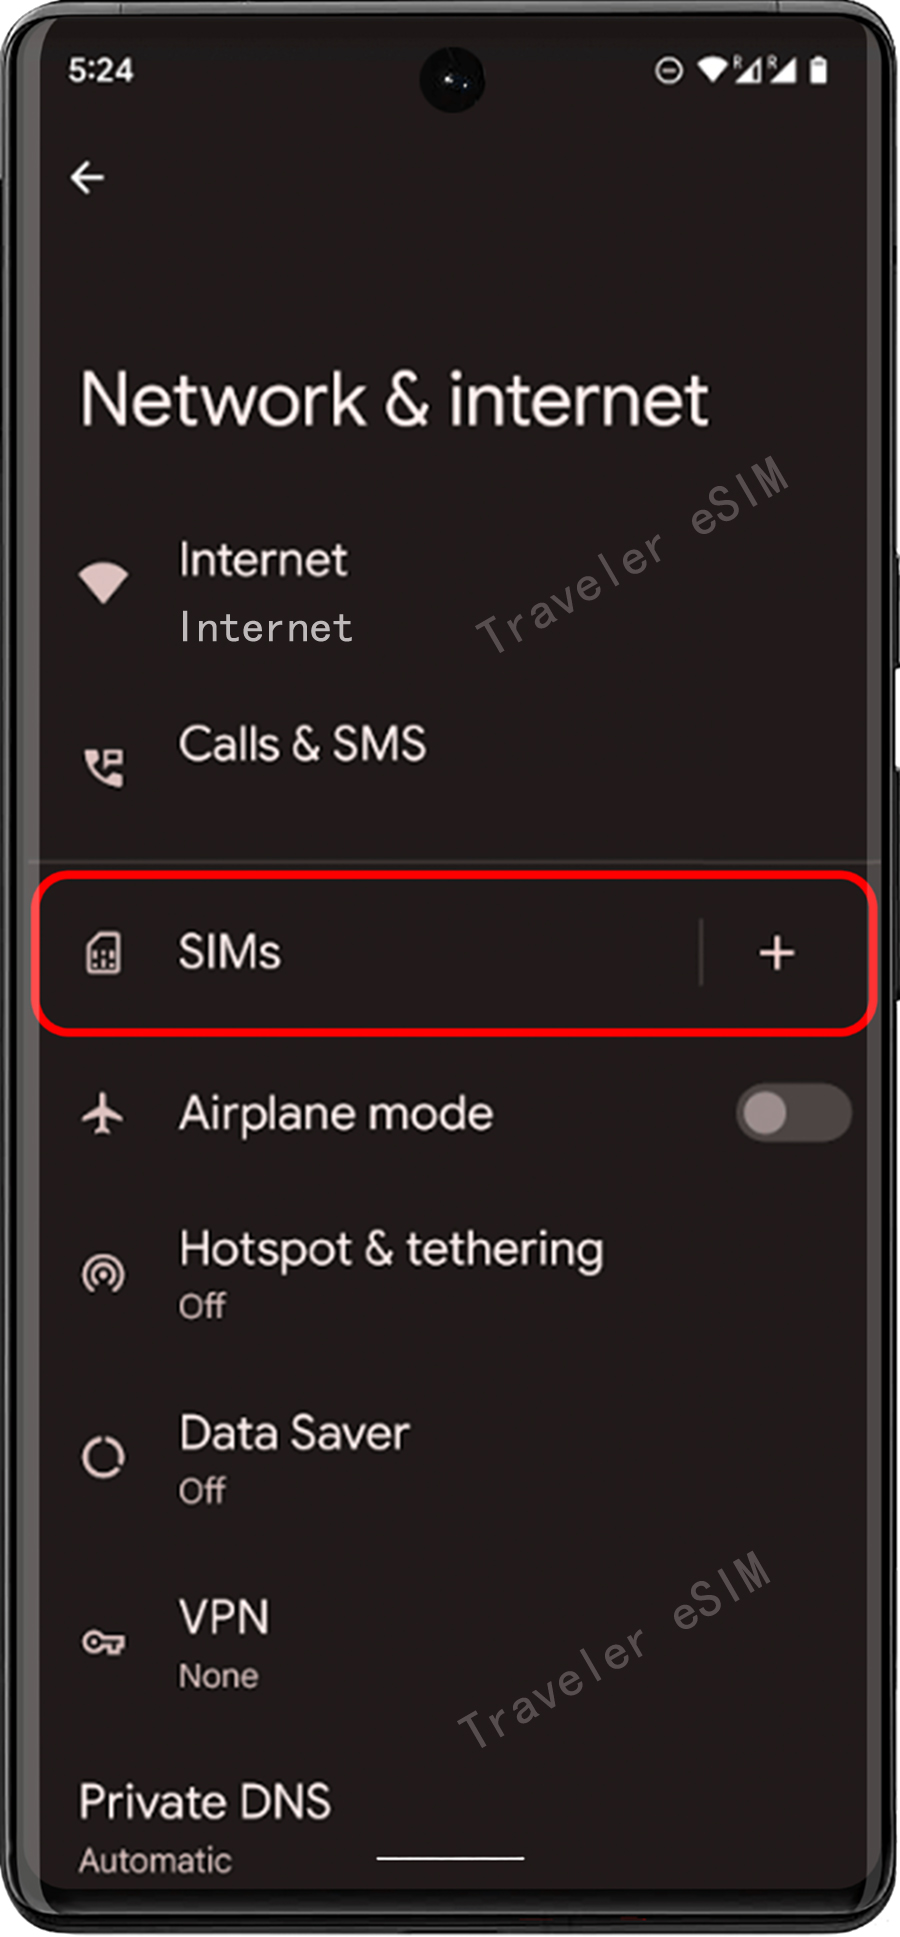
Step 02
② Find "SIMs" and tap the "+" add button.
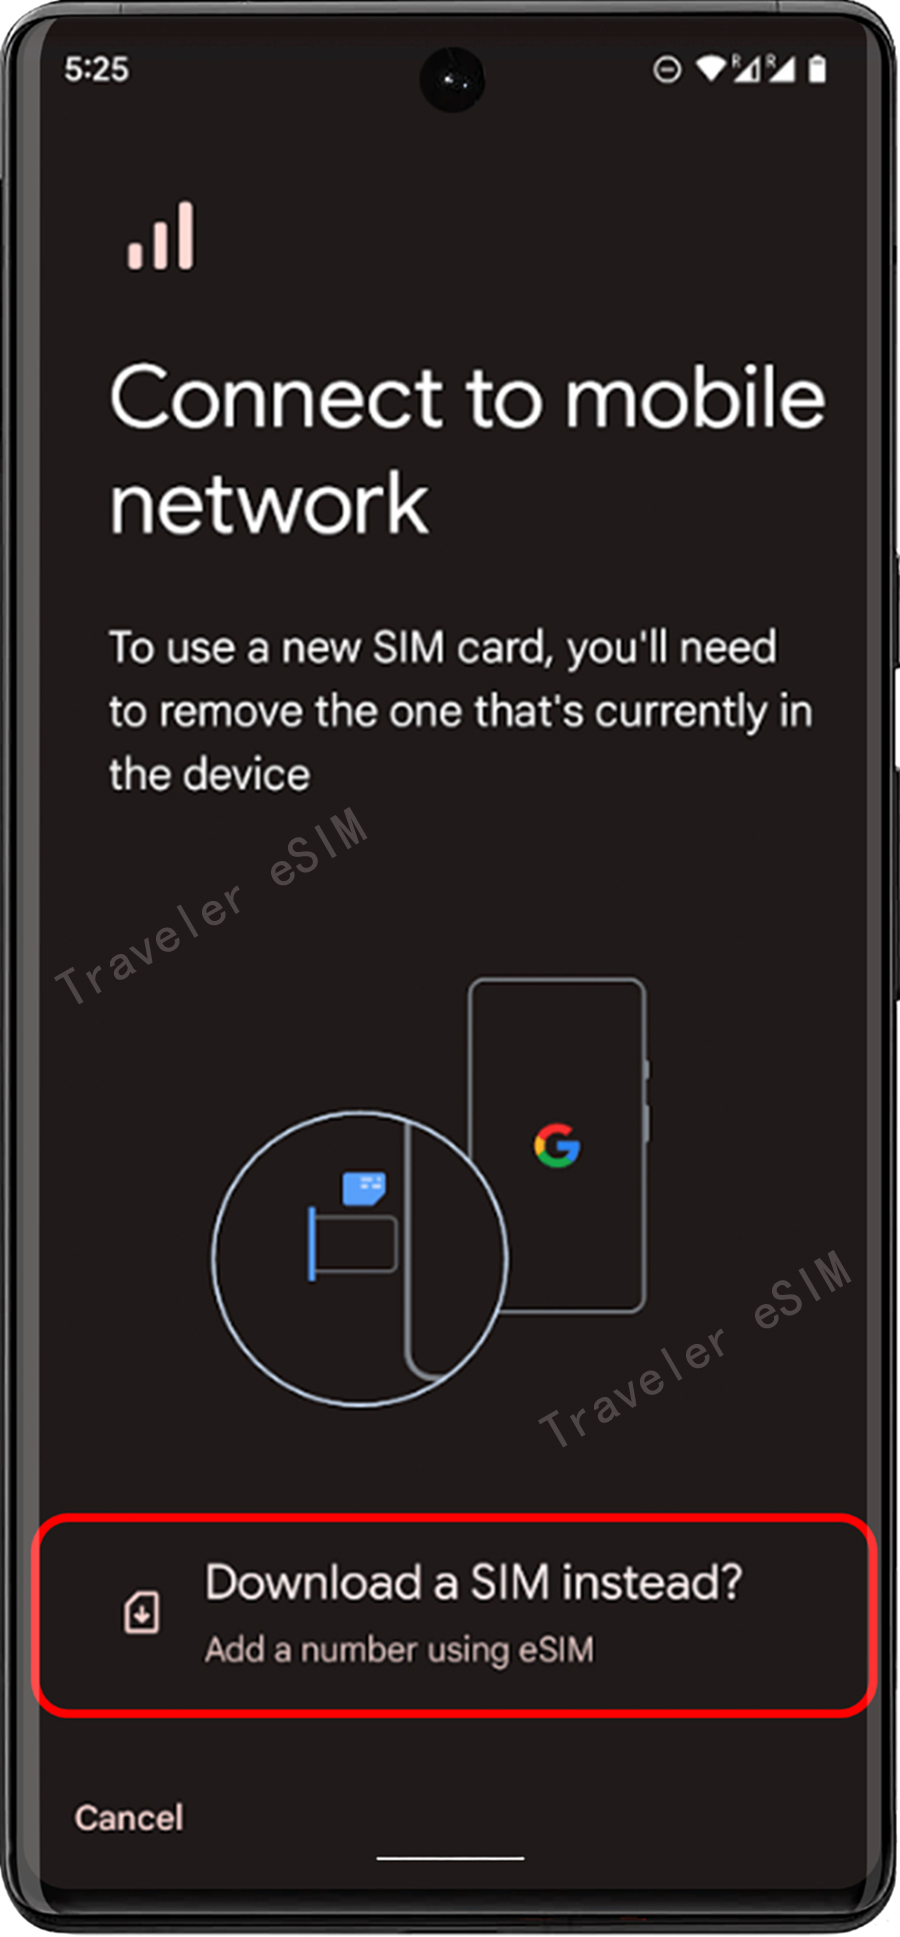
Step 03
③ Tap "Switch to downloading SIM?"
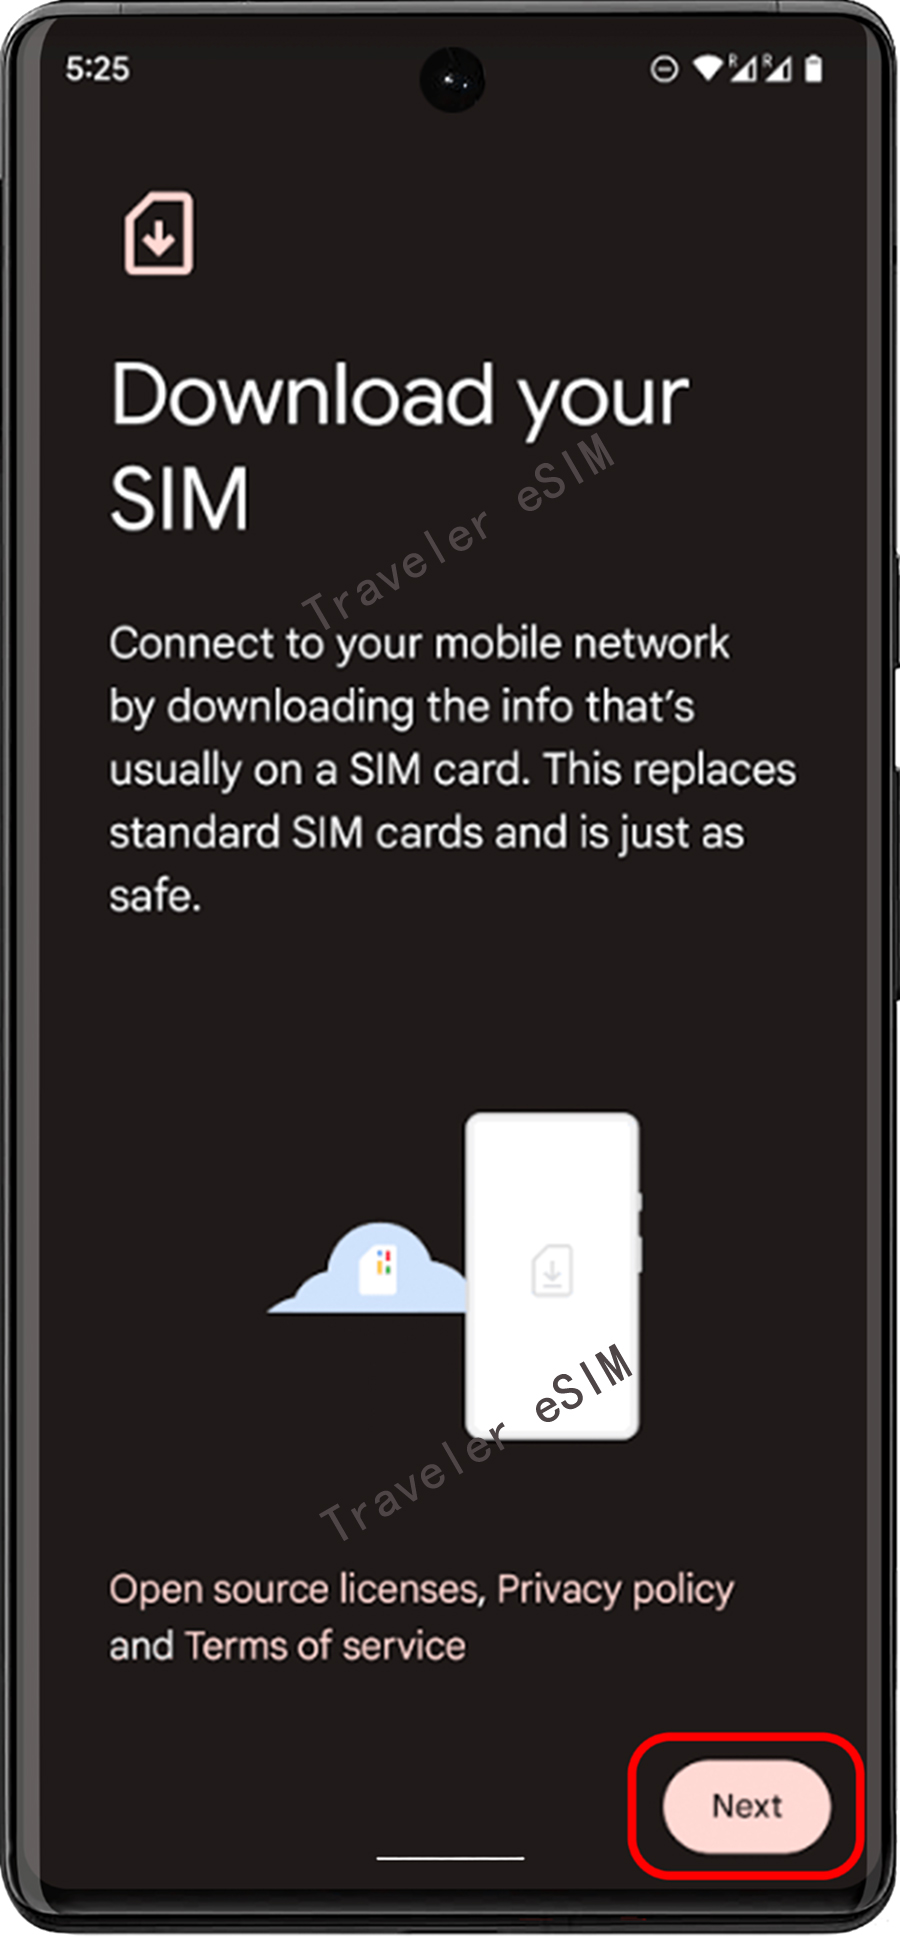
Step 04
④ Navigate to the page displaying the eSIM download, then tap the "Next" button. The device will check the network information.
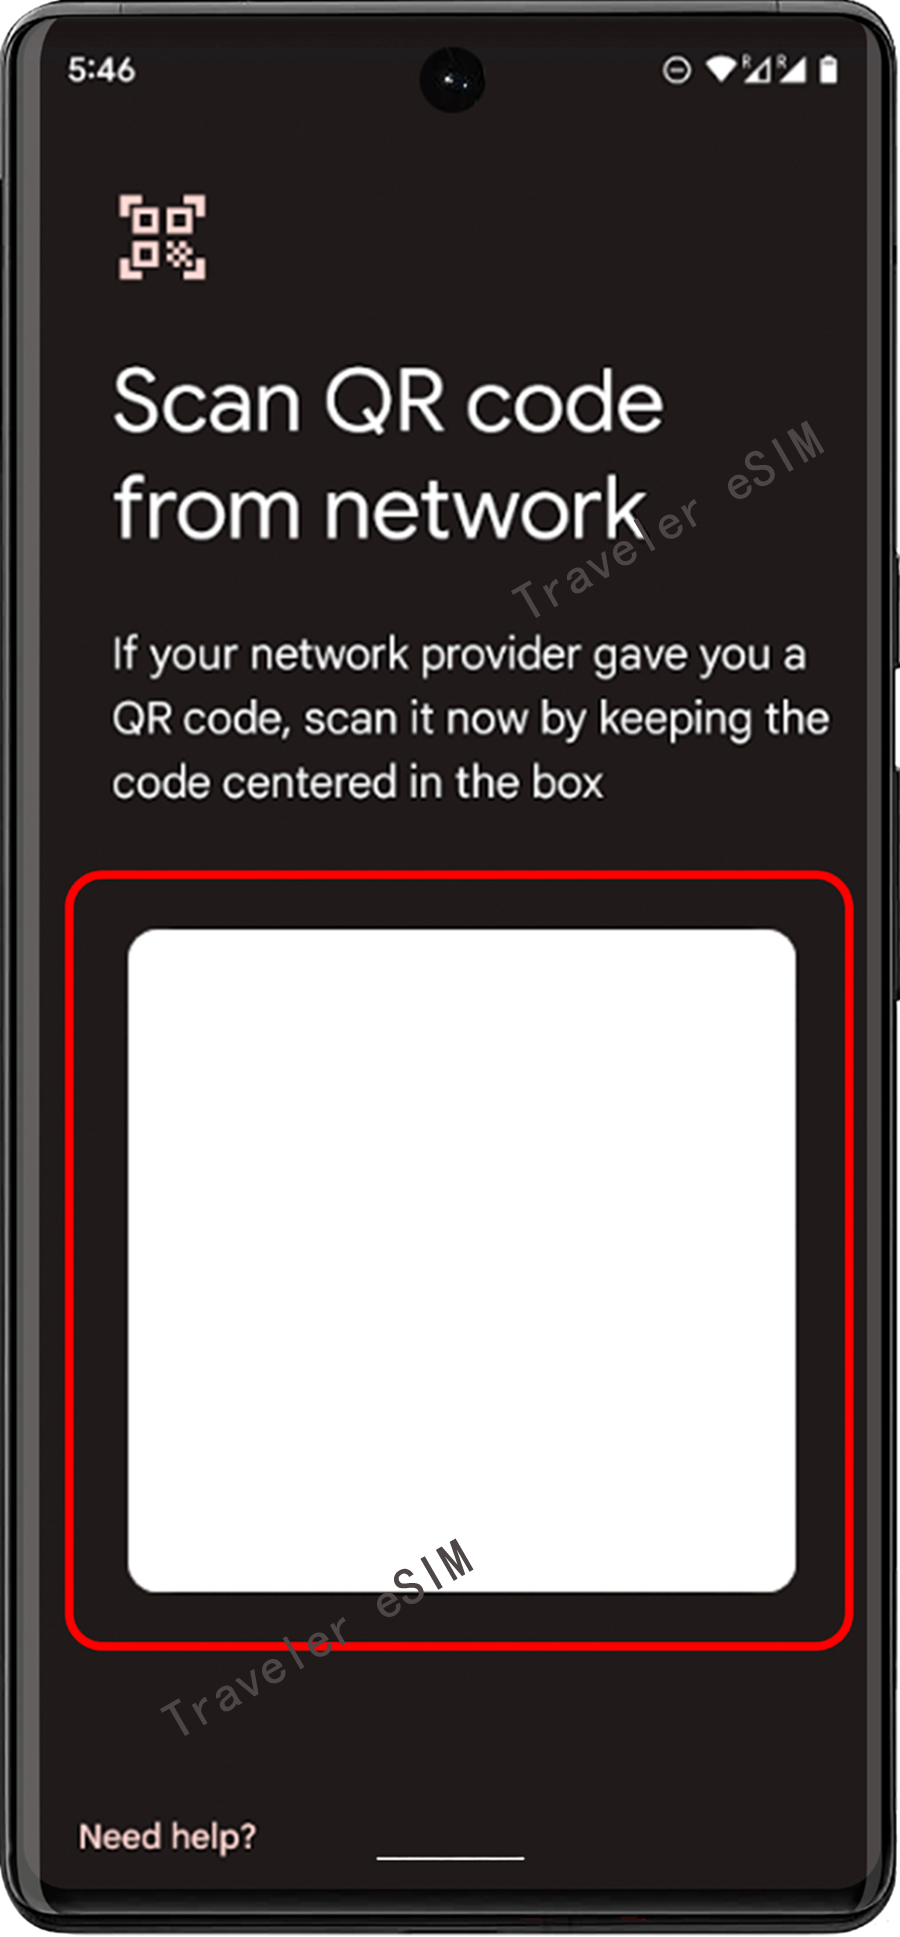
Step 05
⑤ Display the QR code on another device or use a printed one, then scan it with your device and ensure the QR code area is within the guide lines to avoid incomplete download.
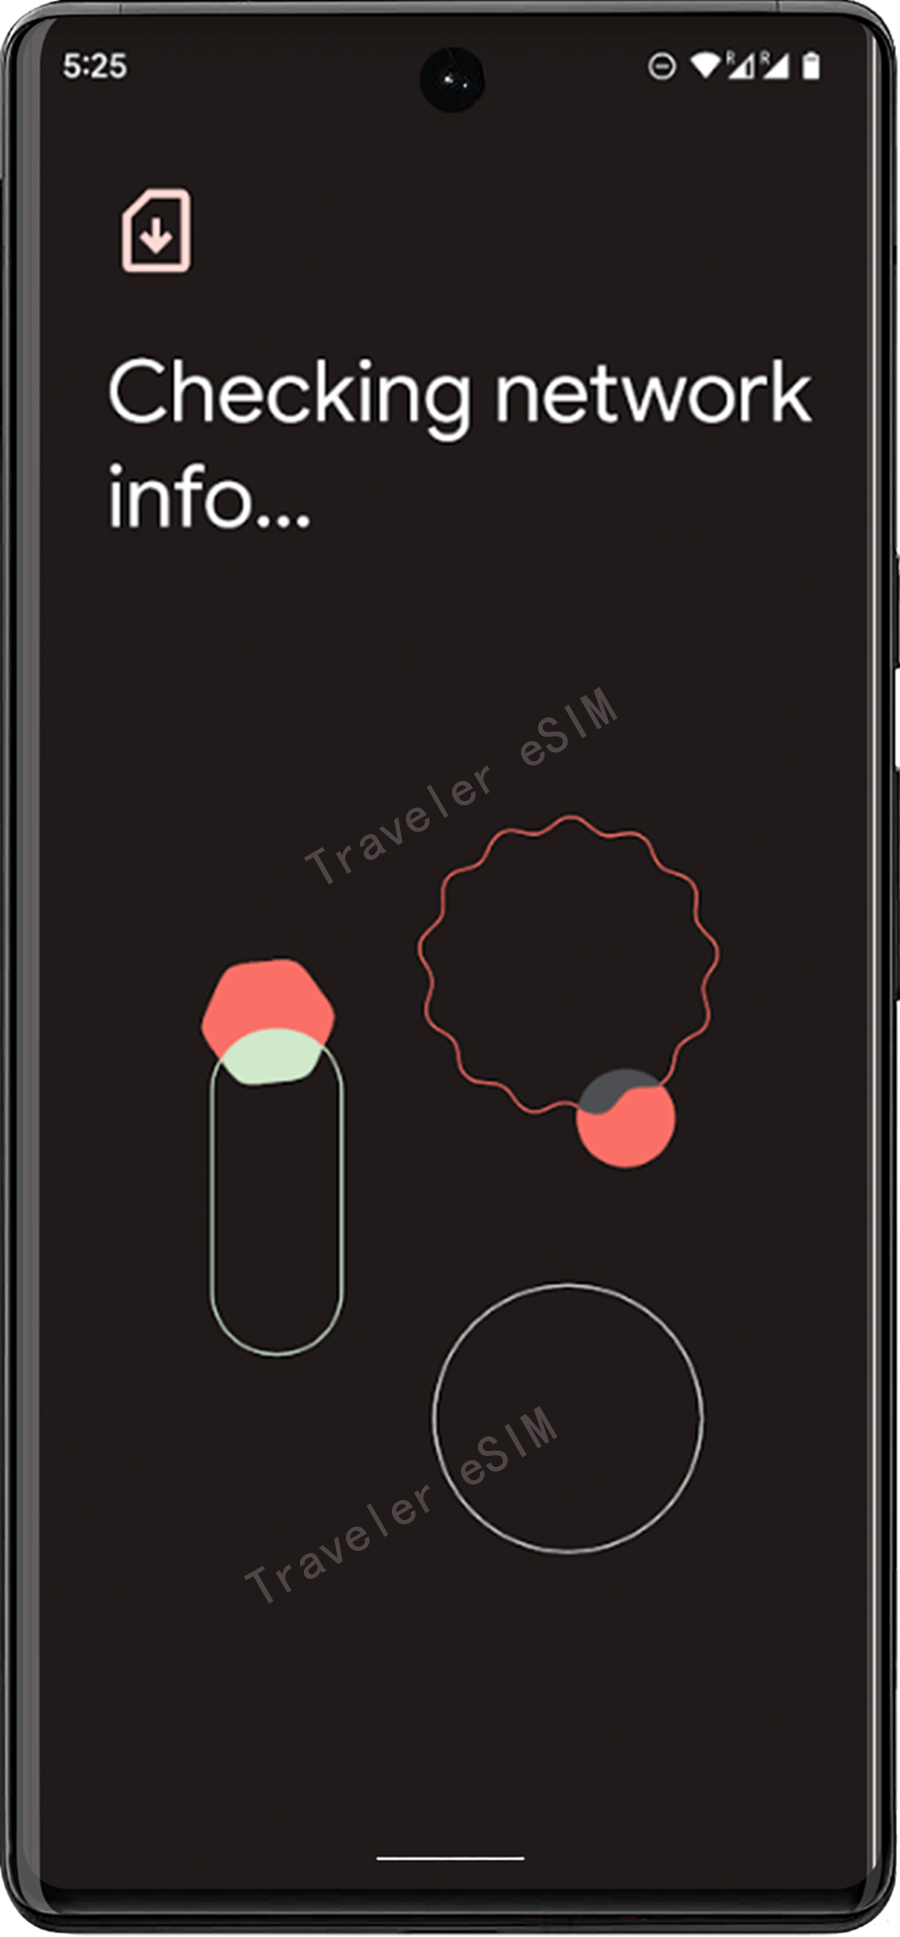
Step 06
⑥ After the QR code is scanned successfully, the network will be checked again.
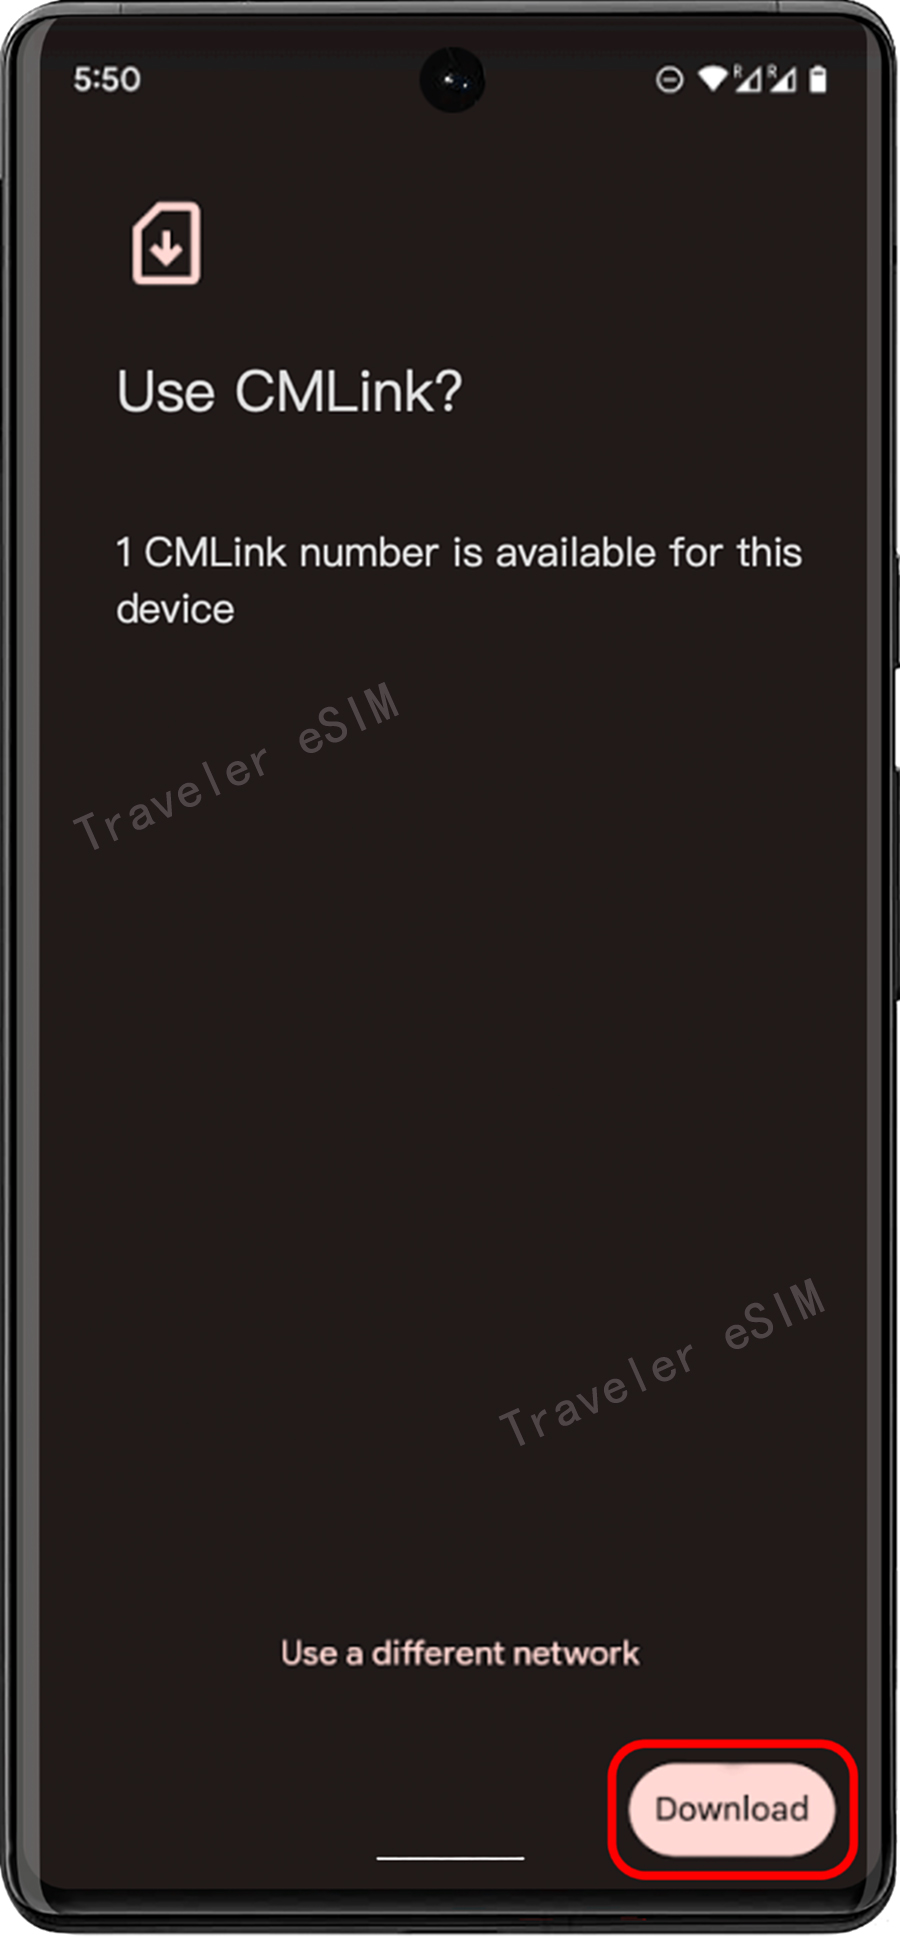
Step 07
⑦ After checking the network, tap the "Download" button and confirm if this is the eSIM you want to add.
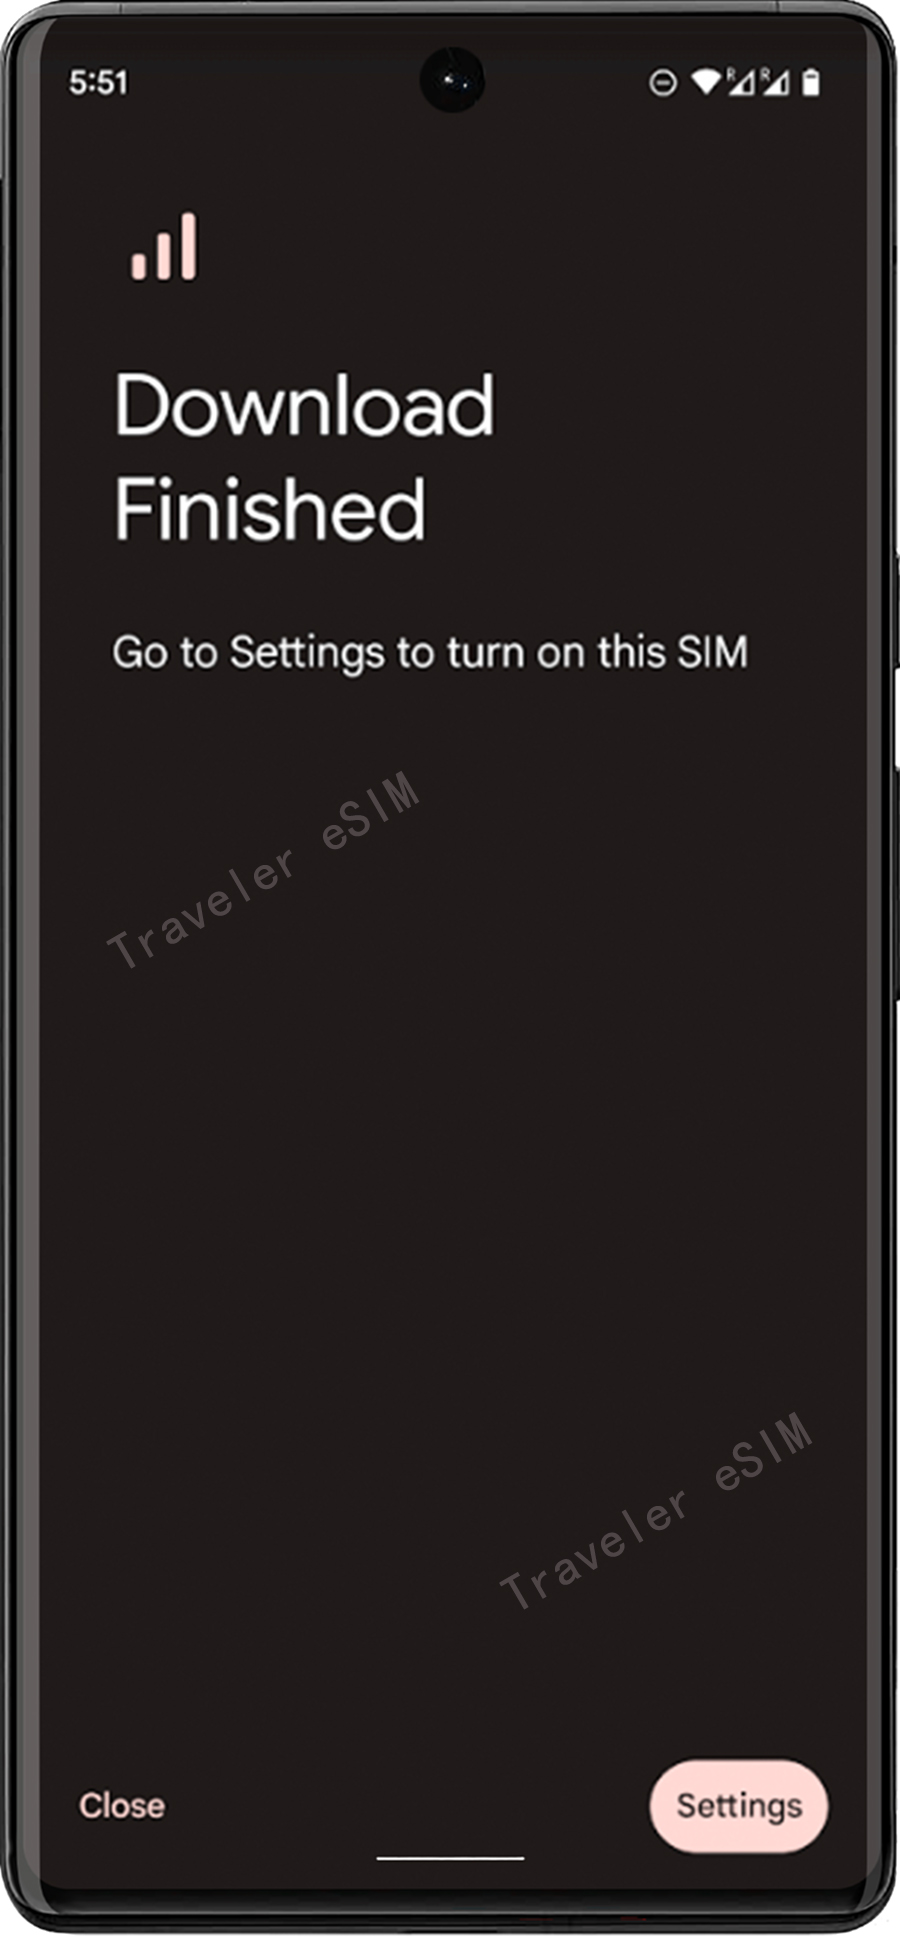
Step 08
⑧ After successful download and installation, you will see the "Download Complete" page.